So, what if this memory gets full and almost to its maximum level? your device will start lagging. Therefore we are going to share four easy methods that will allow you to wipe all your system cache. In Android operating system partitions, the internal storage of the device is divided into different sections one of them is for cached data. The main purpose of cache memory is to easily and fastly access that task that is frequently opened in android. But what if this memory gets full and almost to its maximum level, then your android system starts lagging, apps open very slowly and your android system starts hanging. So to overcome this we are here with a cool way that will allow you to wipe all your system cache. So have a look at the complete guide discussed below to proceed. Also Read: 5 Best Things that can Save you After Losing your Android phone
Steps to Wipe System Cache Partition On Android Devices
The method is very simple and can be done by four methods and with that, all cache memory will be wiped out and your android processing will get boosted up and all the performances of apps will also get the increase. So have a look at this method below.
1. Method: Wipe System Cache Partition Using Recovery Mode
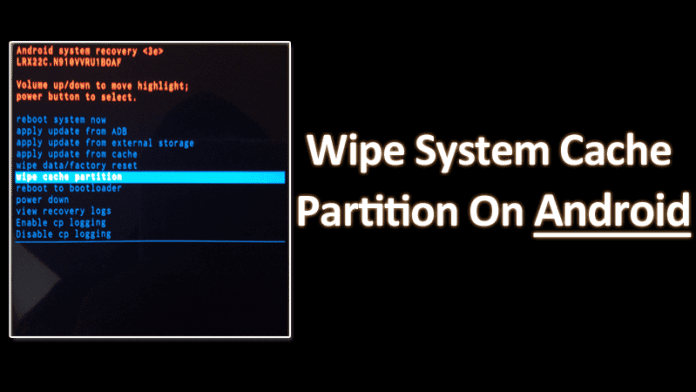
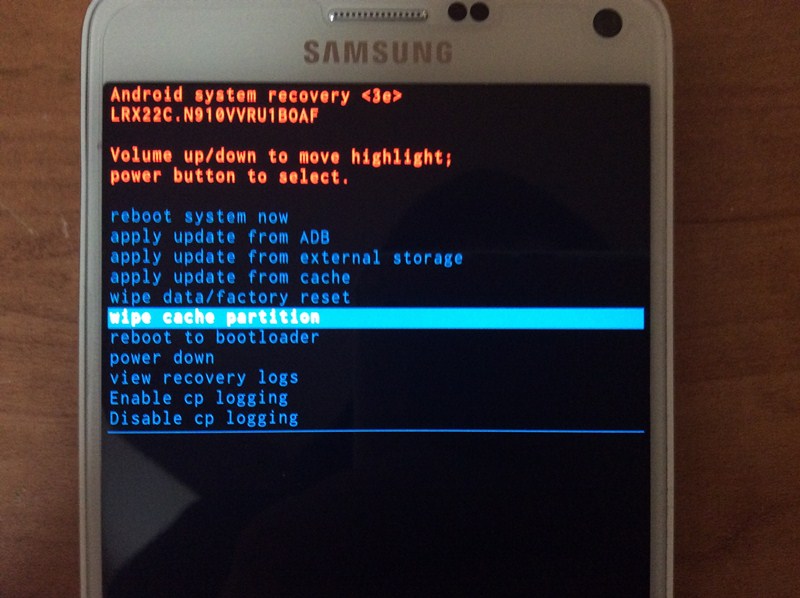
In this method, you will wipe out the complete partition without clearing the cache itself. This one is somehow better than the others as this will clear out complete cache files and make your android perform better. Follow the steps below. Step 1. First of all, turn off your android and wait for short vibration that ensures the proper switching off of the device. Step 2. Now boot into recovery mode by pressing the Power button+ Menu button + Volume down button and this can alter according to make of your android. Step 3. Now there choose the options Wipe Cache Partition and confirm by selecting option yes. That is you are done, cache files will get wiped out.
2. Method: Wipe System Cache Files Using Android Settings
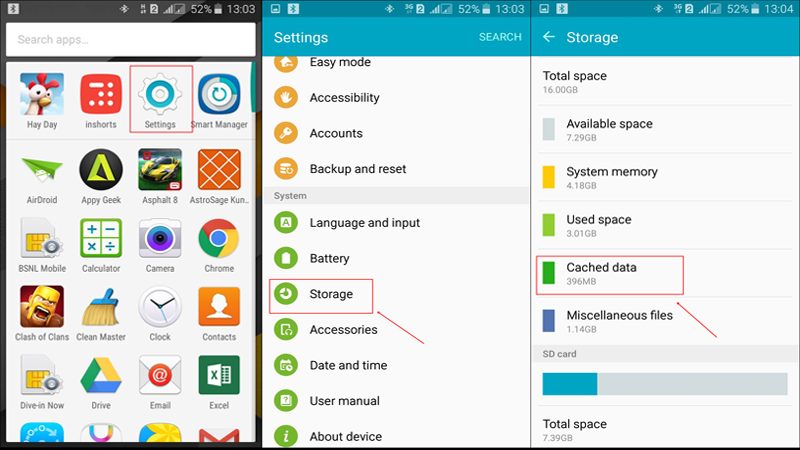
In this method, you will clear all the cache files instead of the complete partition. So proceed with the steps below.e Step 1. First of navigating to Settings-> Storage and there tap on Cache Data. Step 2. A popup will appear to delete it, select delete option. Step 3. That it you are done with these now cache files of all the apps will get cleared out. Note that 2nd method will only clear the temporary cache files and not the cache partition and if you want to clear the cache partition then go for the first method.
3. Method: Manually Clearing Apps Cache
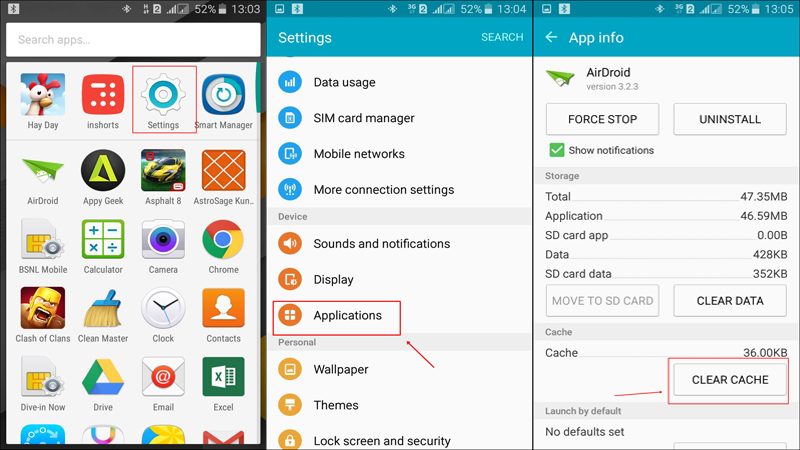
If the above method somehow failed, you can also try clearing the cache of each individual apps. It will take your time but somehow effective. For this, you just have to follow some steps. Step 1. First of all, you need to browse towards Settings Step 2. Now you need to tap on “Apps” Step 3. Now open the apps that you need to clear and simply click on “Clear Cache” This will only clear the temporary cache files, not the cache partition.
4. Method: Using Clean Master App
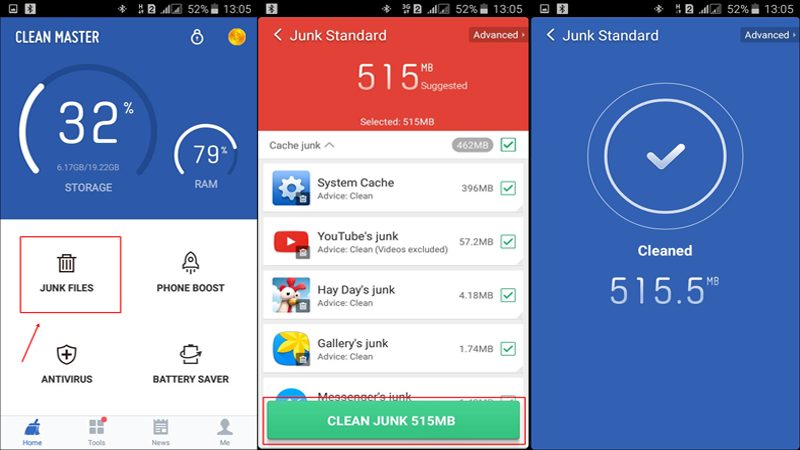
World’s Most Trusted Android Optimizer, Speed Booster, Battery Saver and Free Anti-Virus app, Clean Master Helps Accelerate and Clean Up your devices. It Also Provides Real-time Protection With the #1 Antivirus Engine, and Secures Your Private Data With the AppLock Function. The key point of using the Clean master app is it will let you clear “Cache” files with just a tap. Step 1. You need to open clean master app after installing and then Select the option “Junk Files” Step 2. Now clean master will scan for junk files or you can say Cache files Step 3. Now you need to tap on “Clean Junk” That’s it all your app cache will be cleaned in no time, Clean master also gives you the option to uninstall unused apps and also gives you information about “Big files”. Use this method and easily wipe out the extra cache files that are just in your android to occupy the space so it better is to wipe them all. Hope you like this, do share it with others too. Leave a comment below if you have any related queries with this.
